One of the Joys of Maturity |
|
| Affiliated Advertisers |
Clicking through one of our banner ads or some of our text links and making a purchase will produce a small commission for us from the sale. Building a Raised Garden Bed
The reasons for building a permanent raised bed are varied. Some folks just like the appearance and order of a garden or flower bed neatly contained with landscape timbers. A raised bed may also be necessary to control soil erosion. Our first raised bed (shown below), more of a terrace until completed this spring, was built for that purpose. I really don't recommend building a raised bed this large, but this one fits our current needs.
The raised bed at left is our asparagus patch. It's inside width is 42 5/8", which is actually a little wide for easy access. But even with that dimension, I can reach in from the ends or the sides and work any part of the raised bed without stepping into it.
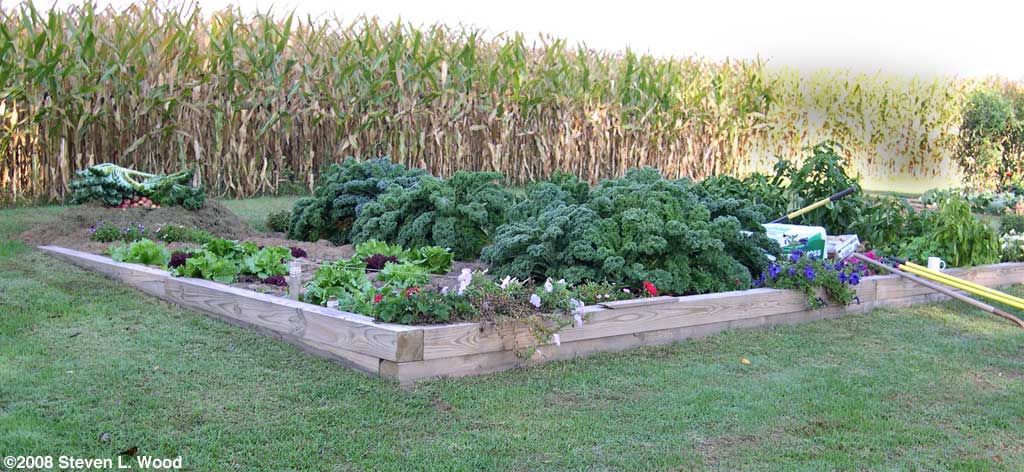
The section shown at right from our main garden plot produced a succession of good crops last summer. The spring intensive planting of onions, carrots, beets, and more onions was easily accessible from the side and via walking boards on the interior. I didn't get around to fully enclosing the main garden until this spring. Once done, I still had several of the 6" x 6" timbers left and put them around the our asparagus patch.
Since our main plot in the Senior Garden suffered both from soil erosion and standing water at times, I also added a dry sump near the middle of the patch. A dry sump is simply a homemade drain where you dig as deep as you can with a post hole digger and fill the hole with coarse builders' sand. It isn't fancy, and it certainly isn't a perfect drain, but it helps dry things out in the middle of the plot.
|


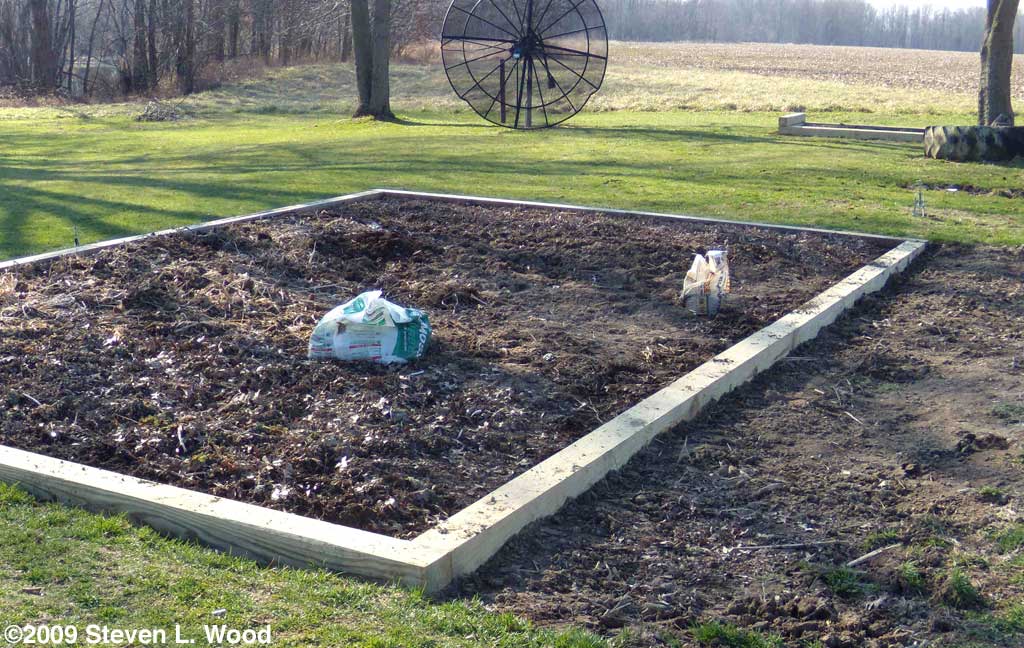
With all the soil amendments added, including eight, forty pound bags of composted cow manure added last fall, the soil level of the plot was well above the surrounding area. I'd used a couple of old boards to hold most of the soil in place, but it was obvious this spring that something better was needed.
Then I scraped away the topsoil with a garden spade to create a level surface for the first landscape timber. I first only dug down about an inch or so, but later went down about 2 1/2" for the first timber. I originally thought I could use just one level of 6"x6" treated timbers (actual size 5 1/2"x5 1/2") to enclose the area. Lacking surveyors tools (or skills) to accurately survey the slope involved, I later realized a second layer of timbers would be required on the high side, as the base would disappear into the soil.
I was able to cut the cost of the project a little by using 4"x6" treated timbers for the second level of boards.
I generally don't get my trench level on the first try and end up rolling the timber in and out of the trench as I add or remove soil to level it. I also keep a bag of builders' sand around to make filling the low spots a bit easier. Having been humbled a bit (and made a good bit poorer by the acquisition of the second level of timbers) by my mistake on the slope of the bed, I used my carpenter's square I read somewhere online that a good way to anchor landscape timbers was to use rebar. Rebar are iron rods used to reinforce concrete. One of our local hardware stores carries precut sections of rebar that measure 3/8"x22". That proved to be an ideal size for firmly anchoring the timbers on our raised beds.
Once I had the first timber in level, I actually laid two layers of timbers, the 6"x6" as the base topped by a 4"x6" that overlapped the end piece, and anchored them both in with rebar hammered straight down. On our first raised bed, I anchored the base pieces first and ended up using a lot more of the rebar than may have been necessary. The photos below are from our main plot raised bed construction, but give a good look at rebar going in both at an angle (inset) and straight down.
I'll add here that while my DeWALT cordless drill I really didn't have to do much cutting for this project. When I did, I used the circular saw to cut on each side of the 6" timbers and finished the cut with my chain saw. I would have never thought of that on my own, but years and years ago, I worked as a carpenter's assistant for one summer. We were cutting heavy rough cut ceiling beams and lacked a saw that could make the cut. So my carpenter boss asked, "Do you have a chain saw?" Since the 6"x6"x8' timbers were actually 96 5/8" long, I cut one timber for the end pieces. That's how I came up with a 42 13/16" inside dimension for the bed. If I were building a raised bed just for vegetables or flowers, I'd make the inside width an even three feet to make everything easy to reach. As it turned out, 42" was just barely enough, as my original planting of asparagus roots had spread beyond the original 3' wide bed, and I ended up cutting roots as I dug out to lay the timbers on each side!
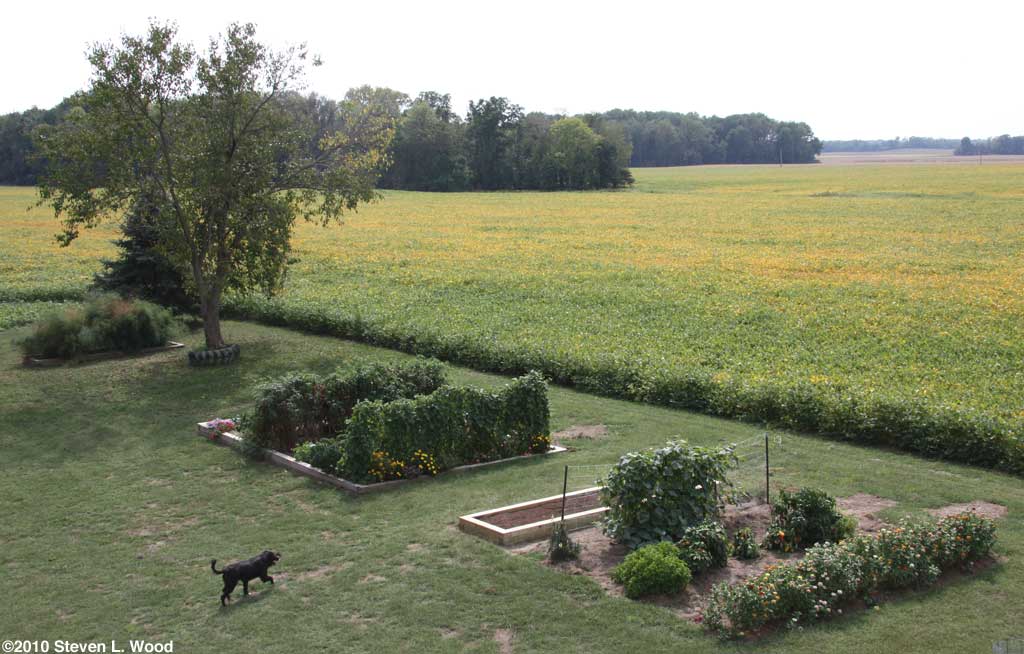
That's about all there was to it, although it took considerable time to get the rest of the raised bed done. The finished product is something that will serve our purposes well. I ran outside as I was finishing up this feature and snapped a shot of the Senior Garden, showing the asparagus bed in the foreground, the main Senior Garden, and our original garden plot at the back.
Materials:
I looked around the web just a little bit after completing this feature to see what else was out there about building raised beds. Not everyone will want to invest as much as I have in my raised beds, and some may want circular or irregular raised beds for landscaping purposes. Here's what I found:
There are also lots of commercial options for putting in a small, raised garden bed. Amazon Let me add a word or two about treated lumber. The old CCA (chromated copper arsenate) treated lumber or timbers have the danger of leaching arsenic, a carcinogen, into your soil. Most treated timbers today should be ACQ labeled (usually with a note that says "no arsenic"). From the EPA site:
Do note that Miles McEvoy, who works in organic certification with the Washington State Department of Agriculture, has said that no pressure-treated wood is allowed in soils used to grow organic food. Are Pressure Treated Woods Safe in Garden Beds by Phil Wood (no relation) gives some alternatives to ACQ treated timber if you're still a bit wary about using it. Since this is a Senior Gardening feature, let me add a personal comment here. After manhandling the heavy treated timbers and then hammering in twenty-seven pieces of rebar in two days, my hands were swollen and my whole body ached for days afterward! It would be better to recruit a strong helper for such a job than doing it by oneself (as I did). Update (5/2/2010)
Of course, the asparagus raised bed was all two deep, so it didn't heave at all!
Update (6/12/2010)
Update (9/17/2010) I added one more, possibly our last, raised garden bed in our main gardening area this week. It's quite similar to our asparagus bed in construction, although I did change the dimensions a bit. Our new raised bed measures 48" wide on its outside dimension. Subtracting the width of the timbers, it leaves about 36" of usable gardening space inside. It's approximately 16' long (15' interior), consistent with our other two raised beds in the area. I went with a slightly narrower raised bed this time, as I've found it a bit difficult getting to the center of our asparagus bed from the side during the summer. The lush growth of asparagus hinders access, but a shorter reach in the new bed will be helpful. And of course, a 48" outside width allowed me to cut the end cap pieces from just one timber, helping hold the cost down just a bit.
The new bed also is a bit higher than our asparagus bed. As you can see in the photo above, I haven't finished backfilling around the outside as yet. But even on the one end I did backfill, I needed a couple of lumber scraps to drive the rototiller into the new bed.
The "fill" for this bed was rather deluxe. I had lots of peat moss and screened compost available, so they were mixed with the existing soil to make what I hope will be an ideal growing medium. We still have just a bit of our main garden not in raised beds. There's actually room for a wide aisle and one more narrow raised bed, probably similar in size to the one I just put in. But that will have to wait a bit, unless the cash fairy visits soon. Timbers are really expensive! One More Bed (4/2/2015)
It has taken a year, but I realized that I hadn't updated this page to reflect what probably will be a final raised garden bed on our property. I got started leveling ground and laying the base timbers on March 31, 2014, finishing the project the next day. The new bed is another with interior dimensions of 3' x 15' and sits beside a previous bed of the same size. The area for the bed is on part of what was the original garden plot when we moved to our Senior Garden. All the years of gardening have caused the soil there to settle considerably, despite all the soil amendments we had added to the area. Building the bed allows us to continue gardening an area that often is too wet for any gardening activity. The actual construction of the bed was the same as its nearby twin, described above. I again used 6" x 6" x 8' treated landscape timbers for the base, topping them with 4" x 6" x 8' timbers. Differences this time around were that I had a nearly brand new 4x4 truck to haul materials, and I'd found a new source for good compost with which to fill the bed. The compost was mixed with a couple of bales of peat moss and the native, underlying soil.
As I write this update on April 2 (2015), we're getting some pretty heavy April showers outside. Fortunately, I'd tilled the bed in the fall and covered it with grass clipping mulch for the winter. In mid-March, I pulled back the mulch and seeded the bed to tall, early peas, which were just beginning to break the soil surface yesterday. The ground around the raised bed when I seeded the peas was a muddy mess, but the raised bed was just about perfect for planting (other than the soil still being frozen here and there). That's one of the big advantages of raised beds. They tend to dry out more quickly than standard, non-raised garden plots. And of course, you can work such a bed from the side, even standing in mud, without damaging the soil structure of the raised bed. With four raised garden beds now available to us, you might think we're done building raised beds. But I keep looking at the area around our shallow well cover, thinking an herb garden in a raised bed might go really well there. Of course, around a water source, I'd probably need to use expensive cedar timbers instead of treated timbers, but...who knows? Maybe the good Lord will grant me enough healthy years to get that one done. Note (5/12/2015) I ran across a podcast today from Growing a Greener World that shows Joe Lamp'l building a whole bunch of raised beds using 6" x 6" cedar landscape timbers. Even with our wonderful, current raised beds, I was a little envious of his raised bed construction. Of course, he did his beds on a much larger scale than we did ours and with a far, far greater budget. But there are lots of nuggets of knowledge on building raised beds in his podcast and in his show notes at the bottom of the page that may prove helpful to my readers. One Last Raised Garden Bed (1014/2016)
From the at Senior Gardening Ads shown on this site do not represent an endorsement or warranty of any kind of products or companies shown. |


| Affiliated Advertisers |
last updated 10/14/2016
©2009 Senior-Gardening.com