One of the Joys of Maturity |
|
| Affiliated Advertisers |
Clicking through one of our banner ads or some of our text links and making a purchase will produce a small commission for us from the sale. Growing Great Melons on Heavy Clay Soil
Several years ago, the farmer who rents the farm ground around us generously offered to let us use part of a small field next to our property that he'd decided was too small to continue planting. Our primary need for space and "clean ground" at that time was for sweet corn, as we had serious corn smut problems in our main garden plots. I had elbow surgery the first year we had use of the ground, and by the time I healed and rehabbed, it was too late to direct seed sweet corn. Seeing some rather sad looking melon transplants at a local discount store, I decided to till up some space in the field and give the poor melons a home. When I first tilled and then dug into the soil, I realized that I was in real trouble trying to grow melons on what was pretty much a burnt out corn field. There was almost no organic matter in the soil, which was heavy gray to orange clay with no topsoil. What grew naturally in the field was a nasty collection of weeds. In the years since, we've grown some spectacular green manure crops that we turned under to improve the tilth of the soil, but what we now call our East Garden is still a challenging growing environment. Fortunately, we've also found a way to grow some great crops of melons!
We pretty much grow all our own transplants now. We used to buy some from garden centers and discount stores, but were put off by the high price of purchased transplants and the limited varieties offered. Growing our own melon transplants opens up the huge array of melon varieties offered by seed houses. I try to start our melon transplants four to six weeks before I'll use them in our large East Garden. Melon transplants can become quite large in that time frame, so I try to stay on the conservative side of the date range.
But starting the plants in larger pots allows me to let two or three plants grow in each pot, which is about what I want for a hill of melons. By the time the melon seed germinates, a lot of our other transplants have been moved from under our plant lights in the basement to a cold frame outside.
I make shallow depressions in the potting mix in the pots for the seeds, putting a seed in the center of the pot and several others towards the corners of the pot. Generally, I use three or four seeds per pot. The seed is covered by about a half inch of planting mix, enough to ensure the seeds get good moisture all around. Once the melon starts are up, I thin the pots to two plants each.
We germinate our melons on some old, but excellent soil heating mats. I use the Gro-Mat brand with a Hydrofarm Digital Thermostat Since our basement plant room, where the melons are germinated, runs around 60-70°F at the time we start our melons, we set our thermostat a bit higher. I usually go with about 80°F, although I push it to 85-90°F for triploid (seedless) watermelon varieties. We germinate our melons on our basement plant rack simply to make things easier on ourselves, keeping the plants all in one area. It also helps that the emerging melons get some light as soon as they germinate through the clear humidity domes we use to hold in moisture. For most home gardeners, a warm spot in the house should do to germinate melons. Once the melon seedlings emerge, the humidomes come off, or the plants get moved to an uncovered tray under our plant lights. We use simple florescent shop lights with 6500K tubes to grow our transplants. We keep the lights 2-4" above the tallest seedlings, raising the lights if the plants begin to bleach out, and lowering them a bit if the plants seem spindly.
Most of our garden transplants get several weeks under our plant lights, but melons are an exception. I get them out under our cold frame as soon as possible, often just two or three weeks after germination. With the cold frame partially opened, the plants have an environment somewhat protected from the wind and receive filtered sunlight. As the plants harden off from UV radiation, strong sunlight, heat, and the wind, we open the frame during part to all of the daylight hours. I need to add a few words of caution here. A few years ago we had an infestation of cucumber beetles get going on our melons under the cold frame. They nearly decimated our melon and squash plants before I discovered what was going on and dispatched the beetles with a very non-organic product. After a week to ten days of hardening off under the cold frame, the plants are ready for transplanting into the garden. Soil moisture conditions may prevent getting the melon transplants moved into the garden at an optimal time. Heavy spring rains can render our East Garden too wet for tilling. We do our best to baby our transplants along at those times, closely watching the soil moisture of the pots, often bottom watering their trays daily. Gardeners with limited space can grow cantaloupes, honeydew, and small watermelon on a trellis (1, 2). Since we now have plenty of space available, we grow our melons in fairly traditional rows. While improving the soil in a whole plot or field takes years of tender loving care, one can improve just enough of a planting hole one puts seed or transplants into rather easily. That's what we do when we transplant melons into our East Garden. We give each of our transplants a deluxe planting hole using peat moss, or compost, when available. Such a melon planting is often referred to as a hill, as the extra material added to the hole raises it slightly above the surrounding ground.
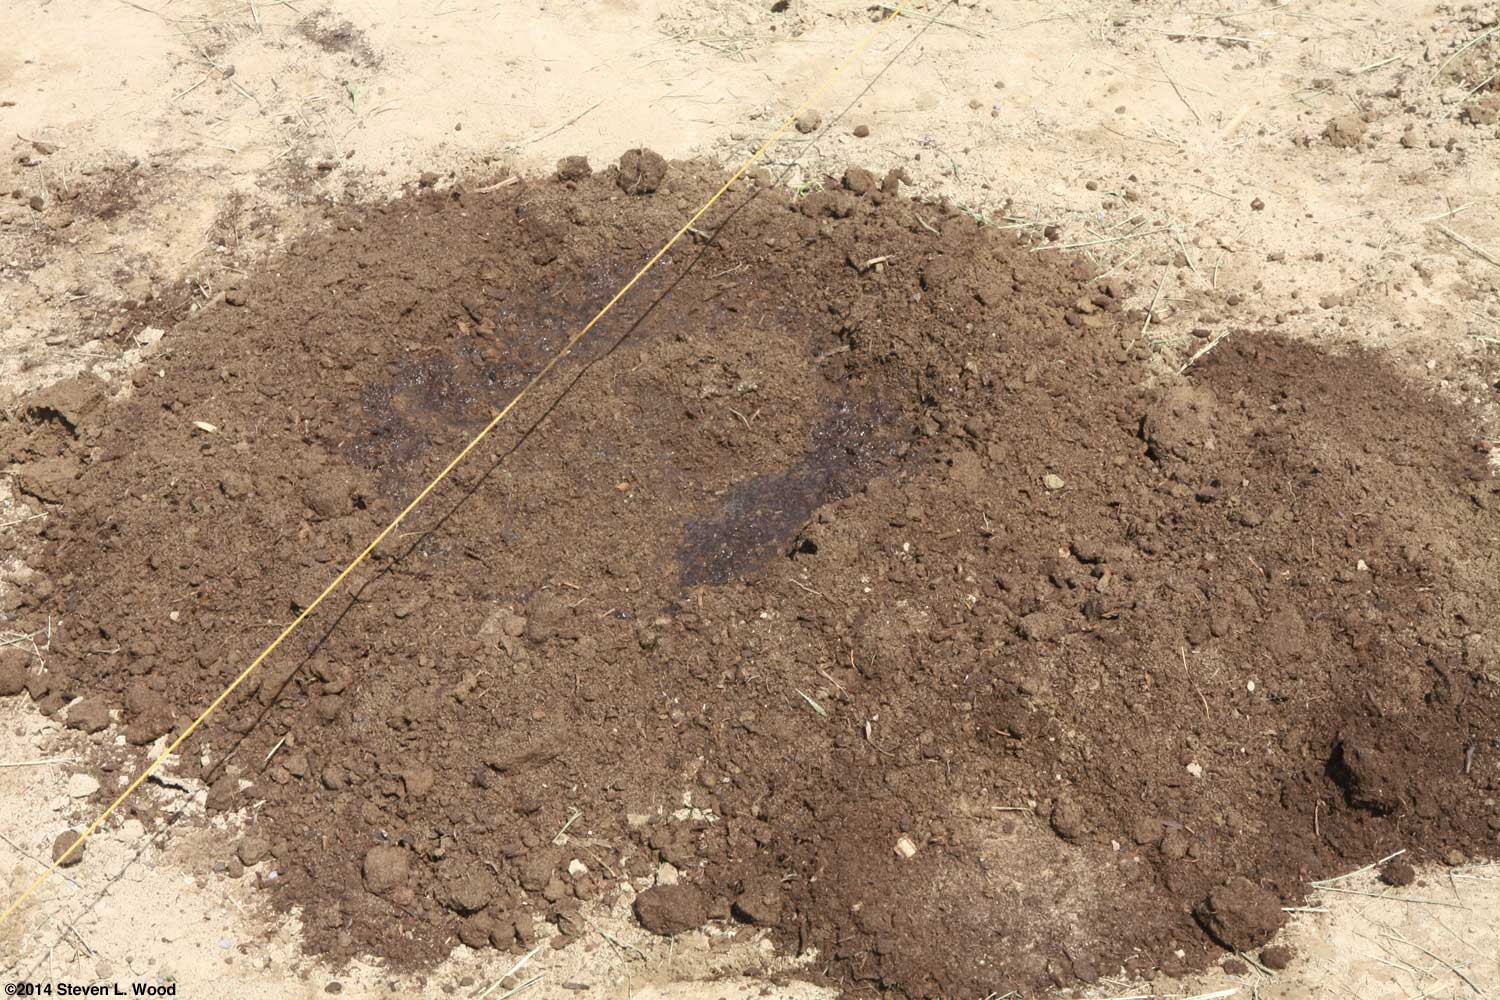
Note that this ground had been thoroughly tilled about ten days before these images were taken. The soil certainly wasn't fluffy as it was just after tilling, but it wasn't all that hard, either.
Serenade biofungicide has apparently been discontinued. Fortunately, a new product called Cease biofungicide is said to have the same formulation, only lots more expensive.
Now for the fun part. If you live in a farming community, you may have heard area farmers derisively refer to "mudding in" a crop. That's planting when the soil is really way too wet for planting, but usually done because the farmer has no other choice due to weather or other conditions. Here, we're going to cheerfully mud in our transplants into our newly created hill.
While it's normally good gardening practice to firm the soil around a transplant, the mud pretty well takes care of this step for you. And that about does the basic transplanting. If we can, we go ahead and immediately mulch our melons transplants with grass clippings to hold in soil moisture and hold back weeds. The amount of grass clippings we have available varies from year to year. Our need for large amounts of grass clippings pushed us to begin mowing (and raking) the whole field the East Garden sits in. That made the farm renter, who was contractually obligated to mow the grounds, very happy. While one can use plastic mulch to warm ones soil, hold back weeds, and hold in soil moisture, we haven't used it in years. I never liked cleaning up the nasty plastic at the end of a season and worried about what it left in the soil as scraps of it decayed. Other than the time invested in mowing and raking, our grass clipping mulch is free. It also is organic, adding some nutrition (and sadly, weed seed) to the soil as it breaks down.
Once the melons are in, we begin our annual race with weeds, trying to get the open ground mulched before weeds take over or the melon plants vine into the open area. Wet, hot grass clippings can really work to your advantage in mulching the open ground. The heat from the decaying clippings burns and kills seedling weeds under it. Well...it gets most of them.
In years when wet conditions prevented tilling (and even mowing), I've resorted to spraying the open ground with Roundup with a 2' x 8' sheet of plywood along the edge of the mulch to prevent the chemical from drifting onto our melon vines. But that's the exception to buy us time to get mulch on the ground, as we try to garden without using herbicides. Once we get a good cover of mulch over the entire melon patch, it's just a matter of pulling the occasional weed that makes its way through a thin spot in the mulch. But after a month or so, we have to remulch where we can, as the mulch decays and allows weeds to pop up through it.
|


If Disaster Strikes We all too frequently have a hill or two of melons fail and die shortly after transplanting. Part of this problem is my propensity for trying new varieties that may not be suited to our growing conditions. Overly wet or dry weather can cause plant failures, as will early, undetected and untreated insect infestations. When we lose a hill of melons, I fill the open spot with an extra transplant, if available. If no transplants are available, I get our melon seed out of the freezer where we store garden seed between seasons and direct seed into the hill. Since a deluxe hole or hill has already been prepared, it's just a matter of popping some seed into the ground and keeping it watered for a week or so. Once the seed germinates, it should have all the nutrition it needs from the preparation of the deluxe hole. Such late seeded hills often produce good melons late in the season when our first plants have pretty well worn themselves out. Caring for the planting - Watering Depending on the weather conditions after planting, one may or may not have to water the transplanted melons. If I'm out in our East Garden transplanting something else and have transplanting solution left over, I give it to our melons. But on the whole, the wet start we give our melons, heavy mulch, plus good spring rains usually get them off to a good start.
In dry springs, I round up all the buckets I can find, load them into the bed of our pickup truck, and fill them with water for the melons. In May and June, we can pump a good bit of water from our deep well. But by July, watering the garden is a luxury we can't afford...if we want drinking water, showers, and such. Our well is just too puny from July through mid-September. (I could tell stories about our four, God fearing, long-haired daughters cussing like sailors when the well ran dry during their shower in the dry months, but you get the idea here.)
The trough around each hill formed at transplanting usually remains intact for some time around the melon transplants, facilitating watering a bit. But it also makes for a fertile area for weeds to get started, despite the mulch we draw up around our transplants. Even with our heavy, initial mulching, we see weed breakthroughs as the season progresses and the mulch breaks down. If I can reach the weeds without stepping on too many vines, I pull them. If not, I just live with the ugly weeds, although I usually try to find a way to them before they go to seed. Note that when I finally get around to cleaning up our melon patch each fall, I sometimes find roots running twenty feet or so out from the melon hills. Keeping our melon area well mulched allows the melon plants to reach out a long way for soil moisture. Insects We face insect and disease problems at times, but not as much as one might think. Our crop rotation plan ensures we're always planting on ground that hasn't had melons on it for at least two years. We use pyrethrin and insecticidal soap
Vine borers can destroy a melon plant before you realize you have a problem. They're more common in squash and pumpkin plantings, but can occur in melons as well. A sawdust like powder near a puncture in the melon's stem is often the first indication (other than the whole plant wilting overnight) that a vine borer has entered and is laying eggs in the stem. At that point, insecticides are ineffective, although one may successfully slit open the stem to find and kill the borer and larva and then cover the injured stem with soil. While commercial growers may find it necessary to apply preventative applications of pesticides, that shouldn't be necessary for most home gardeners. We can closely watch our small plantings for problems, and hopefully, respond appropriately if and when a problem occurs. In some seasons, we've done little to no spraying of our melons and gotten a good crop! Disease
Organic vs. Non-Organic I'm not at all shy or apologetic about using strong pesticides and fungicides when cucumber beetles or powdery mildew and the like occur. Biologicals such as Thuricide (BT) and Serenade and organics such as insecticidal soap and neem oil can be effective. When they and other organic controls prove ineffective, we use what is necessary to save our crops. We have a long history of trying to be gentle to the environment, from our farming years in the 80s when we narrowly banded herbicides in our rows of corn and soybeans and cultivated for weed control. It probably cost us money, but it was the right thing to do. When we have to spray with nasty stuff, we do so only late in the day after blooms have closed and honeybees and bumblebees aren't present. Some of our seed is treated seed and some isn't. We prefer untreated seed when available, but also choose treated seed for applications when we know seed rot may be a problem, such as early spring pea plantings. We use a good bit of chemical fertilizer because we simply can't create enough compost to do the job. We try not to overfertilize, so runoff isn't a problem. When I was farming, I had to decide what route to go with organics. We decided on integrated pest management, which employed what organic methods worked, but still included pesticides and herbicides where necessary. We used lots of manure, as we had a general farm with cattle, pigs, and chickens (and some ill-fated ducks that our dogs ate). A nearby turkey farm also supplied lots of turkey droppings and bedding which we gladly incorporated into our fields. So, we try to do what is right. But we do rely on the responsible use of farm and garden chemicals. Critters
I've tried lots of controls, just as city folks do when raccoons learn to get into trash cans there. The critters are smart, and eventually seem to overcome things such as Nite Guard Solar Predator Control Lights We've tried bad smelling and tasting stuff, which works somewhat on sweet corn, to little or no avail on melons. During the 2014 melon season, we had absolutely no raccoon damage to our melons! The difference may have been a five foot high, forty foot long trellis I put up for peas and pole beans between the melon patch and the woods of the nature preserve that borders the field of the East Garden. More likely, though, is our "five dog alarm system." Over the last two years, after idiots dumping beautiful, if underfed, house trained dogs on us, the pack has pretty well killed or scared off our raccoon population.
You probably don't have room for five dogs. We didn't ask for them, but we're softhearted and couldn't take them to the shelter, as the owners who dumped them should have done. But since we live way out in the country, having five dogs is just a matter of lots of dogfood, lots of love, and annual trips to the vet. (We do cheat and use Ivomec A payoff for keeping the dogs came recently. When I looked out the back door, I saw one of my grandsons, five-year-old Brady, who used to be afraid of the dogs, holding Jackson, a huge lab/great dane cross, by the ears as Jackson licked his face. Jackson is every bit as tall as Brady. Getting back to raccoons, I hope you find a way to control them. One thing we haven't yet employed is a hot wire around our East Garden plot. Electric fences can be effective in deterring deer and raccoons, but they're initially expensive and take a good bit of mowing and weedeating under and around them to keep them effective. We made extensive use of electric fencing during our farming years, possibly driving my current reluctance to use them now. If all else fails, you might do what we did before our influx of new dogs. We just grew enough for the critters and us both. One can keep an eye on when melons were transplanted and various varieties' days-to-maturity to know when to think about harvesting melons. But cool or hot seasons can throw those numbers off one way or the other, so a more hands-on approach is usually necessary.
For home gardeners savoring the full flavor of their melons, waiting one to three days after half slip to the full slip stage will ensure ripeness and best flavor. At full slip, cantaloupes will fall off the vine with just a touch or a gentle pull. Cantaloupes also begin to get an orange tinge to their rind at maturity. They also "smell ripe," that special aroma of a ripe cantaloupe, strongest at the blossom end of the melon. And to every rule, there are exceptions. We've found that our Athena and Avatar melons don't go to half or full slip. Waiting for that to happen with them produces rotting, overripe melons. Unusual growing conditions such as drought can produce the same effect in other melon varieties. There, you have to rely on rind color and odor, as we do with the Athenas and Avatars. Harvesting watermelon is almost an art form. One can thunk melons for ripeness and still end up with pinkish-greenish underripe melons. Days-to-maturity, brown spots on the stem close to the melon, and a whitening of the belly of the melon on the ground are all good indicators of ripeness. And while I won't be foolish enough to try to describe "thunking" a melon for ripeness, it's still one of the best indicators of ripeness. But I have to waste an under or overripe melon or two each year to tune my thunking skills. What To Do With All Those Melons
We've shared with neighbors, but found local food banks to be appreciative of any produce we've brought them. I've delivered some really mixed loads of various melons, tomatoes, butternut squash, and whatever else we have that is far beyond our needs. When delivering a small truckload of melons to The Light House Mission in Terre Haute several years ago, a former resident and then employee came out and asked if I had any "of those wonderful small muskmelons" she'd gotten before. She was referring to the Sugar Cube variety that I'd delivered to the mission on a previous visit. I was only too happy to let her take a couple of the Sugar Cubes as the guys at the mission and I unloaded all the rest. And you never know...you or I could one day be down on our luck and be in such straits. A visit one winter to the mission wasn't to deliver surplus produce, but was to leave bus fare for an extended family member to get home. He'd wound up living there for all the usual sad reasons, having completely worn out his welcome with all family members in the area. And there, but for the grace of God, go I.
Melon Varieties I've already mentioned several melon varieties that we grow. Melons, like most other vegetables, may or may not be well adapted for growing in ones climate zone and soil. We have our longtime favorites, but also try a new variety or two at times, sometimes a highly rated new hybrid, but also heirlooms that we have not grown before. So here's what we've grown over the years. I've noted whether the varieties are hybrid or open pollinated and also linked to a reputable seed supplier. Cantaloupe/Muskmelon
Note that all varieties listed above are hybrids. We've tried some open pollinated varieties in recent years (Amish, Charentais, and Pride of Wisconsin), with little success. Watermelon
Honeydew
For balance, let me add that we've tried the highly recommended Boule D'or honeydew for several years with dismal results. Growing side-by-side with successful plantings of Passport and Tam Dew, the Boule D'ors either die early on or just as their melons begin to ripen. I'm guessing that this one is a good example of a good variety that simply isn't tolerant of our challenging growing conditions. At the risk of being repetitive, let me again say that this listing is what we've grown successfully. Our variety choices are somewhat limited. As the years stack up, I find turning a large plot for melons (sweet corn and potatoes) to be increasingly difficult, despite the addition of a nifty, pull-type tiller a few years ago to augment our thirty year old senior tiller. Melon seed, especially the triploids (seedless), can be expensive. We use several trusted suppliers for our seed, shopping for both price and seed quality. We also carry over unused seed in our manual defrost freezer, extending its useful life for many years. Saving Melon Seed I only rarely save melon seed anymore, as we have too many varieties of melons growing in close proximity to produce dependably true to variety seed. Any seed saved should be from open pollinated varieties only. Seed saved from hybrids may produce undesired results as the offspring may mimic something in its heritage other than the plant the seed was saved from. For watermelon, the seed is mature for saving when the melons are ripe for eating. Simply harvest the seed when cutting the melon (or have everyone spit their seeds in a bucket), wash and dry the seed. Cantaloupe seed is also ready when the melons ripen. Unlike watermelon seed, cantaloupes are a "wet seed." Scoop the seed and pulp from the center of the melon(s) into a plastic or glass container that has a tight fitting lid. Let the seed sit at room temperature for 2-4 days, stirring twice a day. The gel surrounding the cantaloupe seed will ferment and rise to the top of the container along with any light seed. Float off the fermentation and any floating seeds. The light "floaters" are probably bad seed anyway. Rinse the remaining seed and dry it on paper towels, coffee filters, or paper plates. I try to get the dried seed off of paper towels as soon as possible, as the seed tends to stick to the towels if left to thoroughly dry. I move most of our large saved seed, melons and others, to cookie sheets or paper plates and let them thoroughly dry on a shelf for a week or two before packaging them. Since our seed harvests usually come at the hottest part of the summer, our air conditioner, augmented by a dehumidifier in the basement, pulls a lot of the summer moisture out of the air and seeds in the house. About Peat Moss We find sphagnum peat moss to be an indispensable part of our gardening supplies, especially in growing melons. While we make and purchase compost, we find that using peat moss can, in the short term, turn some really nasty soil into productive soil. But there are some drawbacks to using peat moss. Like all organic matter, peat moss decays in the soil over time, so any soil improvements made with it are fairly short term (one to three years). Out of the bale, peat moss resists absorbing water, other than warm water. When we sterilize our starting mix, we generously water the mix before heating it in the oven at 400°F for an hour. Besides sterilizing the starting mix, the heating allows the peat moss to absorb the water we've added. Leaving a bale of peat moss cut open in the garden will allow some of it to become saturated over time. It also makes such bales very heavy to move. Turned thoroughly into ones soil, the peat moss becomes saturated in a few weeks. Peat moss is expensive. We watch for sales, especially sales plus senior citizen discounts at local garden and farm outlets. Most of our peat moss now comes from Rural King, although we scored a pallet of it at bargain basement prices at the end of the season a few years ago at a local TSC. We absolutely avoid buying the terribly expensive, big name brand peat moss with fertilizer pellets added to it. We buy ours in the old, compressed 3.8 cubic foot bales. Peat moss may or may not be a renewable resource. Some researchers have sounded an alarm that at today's rate of consumption, peat moss is not a renewable resource, especially when used as a fossil fuel for heating. Others have noted that the Canadian peat bogs are managed like renewable timber resources and that sphagnum peat moss for agricultural and garden use should be considered a renewable resource. The Garden Web has a pretty lively discussion of the subject. What Others Have to Say About Growing Melons Here are some links about growing melons from sources around the United States:
Disclaimer and Wrap-up This feature story or how-to hopefully gives a good description of how we grow our melons on some pretty lousy soil. What works for us certainly isn't "THE right way" to do it. What I've written here is what has worked for us at the Senior Garden, on our ground, under our weather conditions, most of the time...when we're lucky.
We've grown some fabulous crops of melons in our East Garden over the years. We've also had some really lousy years with only enough melons produced to satisfy the melon cravings of our immediate family. 2014 was one of our lesser seasons. We had plenty of melons for table use and to share with family and my wife's co-workers. But we only hauled one small load of melons to the mission that year. In a good year, they get two or three loads a bit larger than the one shown above. An extended dry spell in July and early August first produced day wilting of our vines, as they tried to conserve moisture. Eventually, the vines totally collapsed from lack of moisture in late August. With some unfavorable changes to the mission, I've shifted our giving of garden excess to our local food bank. One final piece of hard earned wisdom may be appropriate. If you've never grown melons before, or for that matter, a garden, start small. Turn an area of ground about double the space of what the seed packets and tables say. Start just a few hills of melons and see how that goes. Most new gardens that fail do so because enthusiastic, new spring gardeners start more than their lifestyle permits them to care for over a full season. Hmm...that last line applies equally at times to Old Guys on Senior Gardens.
Send feedback to , the Old Guy at Senior Gardening |


| Affiliated Advertisers |
last updated 4/17/2024
©2014 Senior-Gardening.com